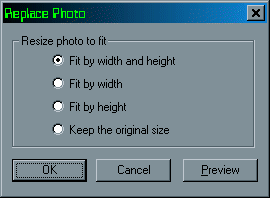
iPhoto Plus 4 Tutorial Part 1: When to Use iPhoto Plus 4 Part 2: A Sample Scan with iPhoto Plus 4 Part 3: Taking the Tours and Viewing the Screenbook Part 4: After the Scan: Saving, Printing, Re-Sizing Part 5: Using the iPhoto Plus 4 Explorer Part 6: Illustrated Examples of a Quick Card and Calendar Templates Step Five: After we choose or scan our picture, the above window appears and instructs us to choose how to best fit our picture into the heart-shaped window. We can fit the picture by width and height, by width, by height or we can keep the original size. Which choice we need really depends on the dimensions of our original picture, although the first choice, fit by width and height, usually fits most images pretty well. Once we have our picture in the heart-shaped window, we can use the hand icon to click and drag the picture to further adjust its position.
Step Six: With our new image in place, it is now time to change the text on the card. To change the text, we move the cursor over the text until it changes into a hand pointing up at the text. Clicking the text, three things appear: a mask surrounding the piece of text, an attribute window and a text icon in the lower-center of the text. Step Seven: The attribute window above allows us to change the font, size and color of our text. To change the actual text message, we need to click on the text icon that appeared in the lower-center of the line of text. Clicking the text icon displays the following text attribute window. |